Learn everything you need to know about building a website with WordPress, including practical tips to enhance user experience and boost conversions.
Feeling overwhelmed by the thought of creating a website yourself? You’re not alone. Many people assume website development is reserved for developers or design professionals. Fortunately, that’s far from the truth.
In this step-by-step guide, we’ll walk you through the entire process of setting up a WordPress website from start to finish. Best of all, we’ll show you how to do it on a budget—no coding skills required!
Step 1: Plan Your Website
Planning is a vital first step in building a website. A clear plan will save you time and help you focus on what matters most.
Questions to Define Your Vision:
- Purpose: Is your website for a personal blog, business, portfolio, or e-commerce?
- Target Audience: Who are your ideal visitors, and what are they looking for?
- Essential Features: Will you need a contact form, e-commerce integration, or blog functionality?
- Website Structure: Outline the primary pages, such as Home, About, Services, Blog, and Contact.
Tools to Help Plan Your Site:
- Mind Mapping Tools: Use platforms like MindMeister or Miro to visually organize your ideas.
- Sketching Tools: Pen and paper or tools like Figma for wireframing.
- Content Inventory: Prepare text, images, and videos for each page in advance.
Step 2: Choose a Domain Name and Hosting Provider
Your domain name (e.g., www.mywebsite.com) is the first impression visitors will have of your site, so choose wisely. Hosting providers give your website a home on the internet.
Tips for Choosing a Domain Name:
- Keep it short, memorable, and relevant.
- Avoid numbers, hyphens, and complex words.
- Use keywords related to your niche, if possible.
Choosing the Right Hosting Plan:
| Hosting Provider | Key Features | Starting Price (Monthly) | Best For |
|---|---|---|---|
| Bluehost | Free domain for 1 year, beginner-friendly | $2.95 | Beginners and small businesses |
| SiteGround | Excellent speed, top-tier support | $3.99 | Growing websites with traffic |
| DreamHost | Affordable plans, free SSL, unlimited bandwidth | $2.59 | Budget-conscious users |
| WP Engine | Managed WordPress hosting with premium features | $20.00 | High-traffic or professional sites |
Pro Tip: Look for hosting providers that include a one-click WordPress installation. This feature can significantly simplify the setup process.
Step 3: Install WordPress
WordPress installation has never been easier. Most hosting providers streamline the process for you.
How to Install WordPress:
- Log in to your hosting provider’s control panel.
- Locate the WordPress installation tool (usually under “Website” or “Apps”).
- Follow the prompts to select your domain, set up your admin credentials, and install WordPress.
- Access your WordPress dashboard by visiting www.yourdomain.com/wp-admin.
Step 4: Select and Install a Theme
Themes control the overall appearance and layout of your website. WordPress offers thousands of free and premium themes suitable for any niche.
How to Choose the Perfect Theme:
- Ensure it’s responsive (mobile-friendly).
- Look for customization options and compatibility with popular plugins.
- Read reviews and check the developer’s support quality.
Installing a Theme:
- Navigate to Appearance > Themes in your WordPress dashboard.
- Click Add New to browse or upload a theme.
- Once you find the right theme, click Install and then Activate.
Popular Themes to Consider:
- Astra: Lightweight and multipurpose, suitable for beginners.
- Divi: Advanced visual editor for creative designs.
- OceanWP: Highly customizable with free and premium options.
Step 5: Add Essential Plugins
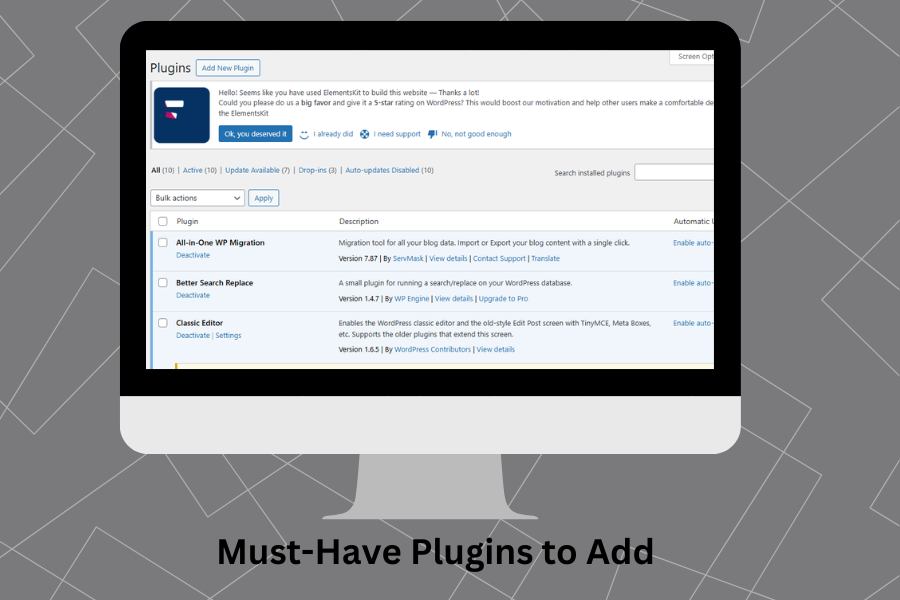
Plugins are tools that enhance the functionality of your website. With plugins, you can add features like contact forms, SEO optimization, and social media integration.
Recommended Plugins for Beginners:
- Yoast SEO: Helps optimize content for search engines.
- Elementor: A drag-and-drop page builder for creating custom layouts.
- WPForms: Simplifies creating forms for contact, surveys, and more.
- WooCommerce: For adding e-commerce functionality to your site.
- UpdraftPlus: Provides automated backups and easy restore options.
How to Install Plugins:
- Go to Plugins > Add New in the WordPress dashboard.
- Search for the plugin by name.
- Click Install Now and then Activate.
Step 6: Customize Your Website
Now it’s time to make your website look and feel exactly how you want. WordPress provides you with powerful customization options, even for beginners. Customization allows you to tailor the appearance, functionality, and user experience of your site without any coding knowledge.
Customization Essentials:
- Logo and Branding: Upload your logo and customize colors under Appearance > Customize.
- Menus: Organize your navigation menu in Appearance > Menus.
- Widgets: Add features like recent posts or a search bar to your site’s sidebar.
Pro Tip: Use the live preview feature in WordPress Customizer to see changes in real time.
Step 7: Create and Add Content
Content is king, and it’s what keeps visitors engaged.
Essential Pages to Start With:
- Home Page: Introduce your brand and its value.
- About Us Page: Share your mission, values, and team.
- Services/Products Page: Highlight what you offer.
- Contact Page: Include forms, email, phone numbers, and social media links.
To add a new page:
- Go to Pages > Add New in the WordPress dashboard.
- Use the block editor to add text, images, and media.
- Click Publish to make it live.
Step 8: Optimize for SEO
A well-optimized website is more likely to rank higher on search engines like Google.
Search engine optimization (SEO) is essential for ensuring that your WordPress website is discoverable on search engines like Google. Without proper SEO, your site may not rank well, meaning potential visitors might never find you. By optimizing your content, you can increase visibility, attract more traffic, and improve your site’s overall performance.
Key SEO Tips:
- Use keywords in titles, headings, and meta descriptions.
- Optimize images with descriptive file names and alt text.
- Use internal and external links wisely.
Step 9: Test and Launch Your Website
Before going live, thoroughly test your website:
- Device Compatibility: Check how your site looks on desktops, tablets, and smartphones.
- Functional Testing: Ensure all links, forms, and buttons work.
- Content Proofing: Double-check grammar, spelling, and formatting.
Step 10: Maintain Your Website
Ongoing maintenance ensures your website stays secure and performs well.
Regular Maintenance Tasks:
- Update WordPress, themes, and plugins.
- Back up your website weekly.
- Monitor performance using tools like Google Analytics.
FAQs
1. Do I need coding skills to build a website with WordPress?
No, WordPress is designed for users with no coding experience. Its drag-and-drop functionality and extensive theme and plugin options make it easy to create a website without writing any code.
2. How do I choose the best theme for my WordPress website?
Look for a theme that is responsive (mobile-friendly), customizable, and fits your website’s purpose. It should also be compatible with popular plugins and have good reviews from other users.
3. What are the must-have plugins for a WordPress site?
Essential plugins include Yoast SEO (for search engine optimization), WPForms (for contact forms), Elementor (for page building), and UpdraftPlus (for backups). Depending on your needs, you may also require e-commerce plugins like WooCommerce.
4. How do I back up my WordPress website?
You can back up your website using plugins like UpdraftPlus or through your hosting provider’s control panel. It’s a good idea to set up automatic backups to keep your website safe.
5. How long does it take to create a WordPress website?
The timeline varies depending on your website’s complexity. A simple site can be created in a few hours, while a more intricate site (with custom features, e-commerce, etc.) could take a few days or even weeks.


